Key Takeaways
- Keeping water moving away from the wall is the most important way to protect log siding.
- Stains, soft wood, open checks, loose joints, and insect activity need prompt attention.
- Lasting repairs remove damaged material and correct the source of moisture.
- Gutters, flashing, roof runoff, soil height, and landscaping all affect exterior wood.
- Small nonstructural repairs may suit careful homeowners, while widespread or structural issues require professional help.
Log siding gives a home a warm, durable appearance, but it needs consistent care to stay that way. Water does not have to pour through a wall to cause trouble. Repeated splashback, a slow gutter leak, wet mulch, or an opening around a window can keep wood damp long enough for finishes to fail and decay to begin. When damage is already visible, consulting log siding repair experts can help homeowners identify both the wood damage and the water path behind it.
The goal is not to permanently waterproof exterior wood. Wood needs to shed water and dry after wet weather. A practical maintenance routine focuses on drainage, airflow, sound sealant joints, protective finishes, and early repairs before a small soft spot becomes a larger wall problem.
Why Moisture Control Comes First
Rain, snow, humidity, and wind-driven water all place stress on siding. Lower courses are especially vulnerable because they receive roof runoff and ground splashback. Wood that repeatedly gets wet but cannot dry can swell, crack, lose finish adhesion, and eventually support fungal decay.
Good performance depends on details that manage water before it reaches the wall and allow drying if some moisture gets behind the siding. Proper roof overhangs, flashing, gutters, ground clearance, sealed end grain, and a drainage gap work together. The U.S. Forest Service notes that rain screens, end-grain sealing, and back priming can improve the performance of wood siding finishes by limiting moisture absorption.
Common Causes Of Log Siding Damage
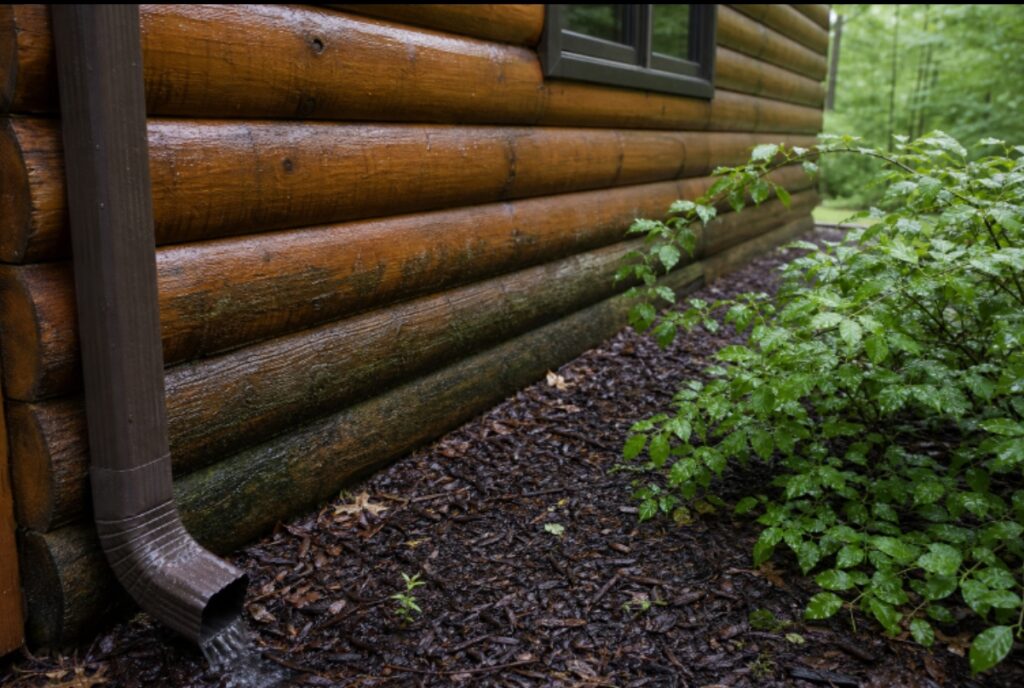
Most siding damage begins with repeated conditions rather than a single dramatic storm. Look for overflowing gutters, leaking seams, or downspouts that dump water beside the wall. Check roof edges and flashing around chimneys, windows, doors, decks, and wall intersections. Cracks and gaps can also admit water, especially where seasonal movement has stressed a joint.
Vegetation pressed against the siding blocks airflow and holds moisture. Mulch and soil that reach the lowest siding course create constant splashback and may invite insects. Worn stain or sealer leaves wood more exposed to ultraviolet light and moisture cycling, while freeze-thaw conditions can enlarge existing checks and splits.
Warning Signs That Need A Closer Look
Surface Clues
- Dark streaks, recurring water stains, or greenish growth below gutters and roof edges.
- Peeling finish, gray dry-looking areas, or exposed bare wood.
- Open checks, splits, failed caulk, or gaps near corners, windows, and doors.
- Soft spots at the bottom of walls, beside steps, or behind dense plantings.
- Bulging, shifting, or uneven siding that no longer sits flat.
Hidden Clues
Tap the siding gently and compare the sound with a known solid area. A dull or hollow sound can indicate a void or deterioration beneath the surface. Musty odors inside, fresh insect holes, fine sawdust, or stains that return after every storm also justify a closer inspection. If a questionable area remains damp after several dry days, use a moisture meter or arrange an assessment.
A Simple Inspection Routine For 2026
- Walk around the home after a heavy rain and watch where the water travels.
- Inspect below gutters, downspouts, windows, doors, roof edges, and deck connections.
- Check lower siding for wet soil, mulch contact, standing water, and splashback.
- Press suspicious areas carefully with an awl or screwdriver. Sound wood should resist penetration.
- Photograph stains, checks, and gaps with the date, then recheck after the next wet-weather event.
- Inspect at least every spring and fall, plus after severe storms or long wet periods.
How To Decide Between Repair And Replacement
Minor surface weathering can often be cleaned, dried, lightly sanded, and refinished if the wood remains firm. A small isolated decayed spot may be repairable after all soft material is removed and the surrounding area is fully dried. Deep, spreading, or recurring decay usually calls for replacing the affected siding section.
Location matters as much as size. Damage near a roof support, deck ledger, balcony, window opening, or major corner may involve framing or water-management details behind the siding. Do not cut into potentially structural material without qualified guidance. Most importantly, correct the leak, drainage failure, or trapped-moisture condition before completing cosmetic work.
Why Covering Damaged Wood Usually Fails
Installing new material over decayed siding can hide the problem without stopping it. Moisture may remain trapped, fungal damage can continue, and insects may stay active in concealed wood. A patch also cannot solve failed flashing, overflowing gutters, or soil piled against the wall. A proper repair exposes the affected area, removes unsound wood, restores compatible materials, and redirects water away from the structure.
Safe DIY Steps For Small Repairs
- Wear eye protection, gloves, and a suitable dust mask. Keep ladders on firm, level ground.
- Mark the full damaged area, then remove weak material until only firm wood remains.
- Let the area dry completely before applying a compatible preservative, filler, or replacement piece.
- Seal exposed end grain and vulnerable joints, but avoid sealing wet or frozen wood.
- Allow repair products to cure, then apply a compatible finish to blend the repair with the surrounding siding.
When To Call A Qualified Professional
Call for help when damage supports a roof, deck, balcony, or upper wall, or when siding bows, moves, or separates from the house. Professional evaluation is also wise when several areas decay at the same height, moisture returns after repair, insects are present, or damage surrounds windows and doors. Tall ladders, scaffolding, and extensive power-tool work add another reason to bring in a qualified contractor.
How Roofs And Drainage Protect Exterior Wood
A log-sided home works as a weather barrier. Keep gutters clear, repair leaking seams, and extend downspouts so water discharges away from the foundation. Inspect flashing at roof edges and openings, keep mulch and soil below the siding, and trim shrubs so air can circulate. The air and water infiltration guidance for log buildings emphasizes that durable protection depends on a coordinated system of joints, sealants, drainage, and water management rather than on a single product.
A Seasonal Maintenance Calendar
Spring
Check for winter cracks, loose joints, damaged flashing, stains, and damp areas near decks and foundations. Clean gutters and verify that downspouts discharge properly.
Summer
Wash away surface dirt with a cleaner approved for exterior wood, trim vegetation, and complete repairs during a dry weather window.
Fall And Winter
Inspect sun-exposed south- and west-facing walls for finish wear, clear leaves from gutters and roof valleys, and make sure drainage remains open before freezing weather. During winter, watch for ice buildup, snow piled against walls, and new stains. Document changes for the spring inspection.
Questions Homeowners Often Ask
How Often Should Log Siding Be Inspected?
Perform a full inspection twice yearly and add checks after severe storms, major temperature swings, or prolonged rain.
Can A Homeowner Repair A Small Soft Spot?
Possibly, if it is isolated, shallow, nonstructural, and the moisture source is clear. If the area is spreading or near an opening or support, seek an assessment first.
Does New Stain Stop Existing Rot?
No. Stain protects prepared, sound wood. It does not restore decayed wood or correct an active leak.
Practical Details That Help Wood Dry Faster
Drying time is a major part of siding durability. After rain, inspect whether water can escape from horizontal ledges, trim joints, and the bottom edge of each course. Keep weep paths, drainage spaces, and vented areas free of paint, caulk, debris, or insect nests. These small openings are not defects; they help incidental moisture escape from the wall rather than collect behind the finish.
Be careful when adding caulk. Flexible sealant belongs where a joint is designed to be sealed, such as around properly detailed trim or penetrations. It should not be used to bridge large, moving checks without understanding how the siding is intended to drain. Trapped water can cause more damage than a visible gap.
Choosing Compatible Repair Materials
Repairs last longer when replacement wood, fasteners, fillers, sealants, and finish products work together. Match the new piece as closely as possible to the existing siding profile, species, and moisture condition. Using very wet replacement wood can create gaps later as it shrinks. Likewise, a rigid filler may crack where logs or log-look boards naturally expand and contract.
Before buying a coating, determine whether the wall currently has a stain, paint, a clear finish, or a water repellent. Follow the manufacturer’s surface-preparation and recoat directions, including temperature, humidity, and drying-time limits. Test a small, inconspicuous spot first if color matching matters. Never apply a new coating over dirt, mildew, loose finish, or damp wood.
Recordkeeping Makes Future Maintenance Easier
Keep a simple home maintenance file with inspection dates, photos, weather notes, product labels, and receipts. Photographs taken from the same location each season make it easier to spot finish loss, movement, or recurring stains. Note when gutters were cleaned, when sealant was renewed, and which walls receive the strongest sun or wind-driven rain.
This record also helps a contractor diagnose patterns rather than treating each mark as an isolated problem. For example, decay that reappears only below one roof valley points toward runoff, while damage around several windows may suggest a flashing or trim detail that needs attention. Clear records support better decisions and help prevent repeated cosmetic repairs.
Give special attention to transitions where different materials meet. Metal, masonry, decks, railings, utility lines, and light fixtures can interrupt the siding plane. Each penetration needs a durable water-shedding detail, regular inspection, and enough clearance to avoid rubbing, trapped debris, or damage to the surrounding finish. Address problems promptly before moisture spreads farther.
Conclusion
Healthy log siding depends on inspection, drying, drainagedrainage, and timely repair. Small defects rarely improve on their own, but they are often manageable when found early. Watch for moisture clues, trace water to its source, repair only after the wood is sound and dry, and maintain the roof-to-ground drainage system that protects the wall.