A home flood can begin with a burst pipe, failed appliance hose, overflowing toilet, roof leak, or severe storm, and the first few hours often shape the entire recovery. Water can travel quickly beneath flooring, behind baseboards, into wall cavities, and through insulation. For Austin homeowners facing a larger loss, water extraction Austin services from WOW Total Cleaning & Restoration can provide a structured response that includes water removal, drying, disinfection, and property recovery. The company works with residential and commercial properties throughout Austin and nearby communities, including Round Rock, Cedar Park, Buda, Kyle, and San Marcos, making it a useful local option when hidden moisture or contaminated water may be involved.
Fast action does not mean rushing into danger. It means following a calm order of priorities: protect people, stop the source if it is safe, document the loss, notify the insurer, and begin proper drying. Even when water appears limited to one room, moisture may have already reached materials that are difficult to inspect without equipment.
Why The First Day Matters
Standing water can damage flooring, cabinets, furniture, drywall, and structural materials. The longer porous materials remain wet, the more difficult they may be to dry and restore. Damp conditions can also support mold and bacterial growth, particularly in enclosed spaces. The EPA explains that controlling moisture and eliminating mold growth are closely connected, which is why visible water removal alone is not enough.
Step One: Protect People And Pets
Move children, pets, older adults, and anyone with respiratory concerns away from the affected area. Do not walk through standing water if outlets, cords, appliances, or electrical panels may be nearby. Treat water as contaminated until you know its source, especially if it came from outside, a toilet backup, a drain, or a sewage line.
Leave the property and call for help if you notice a gas smell, sagging ceiling, cracked walls, shifting floors, exposed wiring, or extensive flooding. Do not try to enter an unsafe room just to retrieve belongings.
Step Two: Stop The Water If It Is Safe
If a plumbing failure is causing the flood, shut off the closest fixture valve when it can be reached safely. A toilet supply line, washing machine hose, dishwasher connection, refrigerator line, or water heater may have its own shutoff. For a burst pipe or unknown plumbing leak, turn off the main water valve to the home.
If reaching the valve requires walking through electrical hazards or entering a damaged area, do not take that risk. Contact an emergency plumber or utility provider instead.
Step Three: Turn Off Utilities With Care
Electricity and water are a dangerous combination. If water is near the breaker panel, outlets, plugged-in devices, or major appliances, avoid touching anything electrical. Contact a qualified electrician or your utility provider before restoring power. Do not use candles, propane heaters, charcoal grills, or fuel-burning equipment indoors. Generators should remain outdoors and away from windows, doors, and vents.
Step Four: Record The Damage Before Cleanup
Once everyone is safe, take wide and close-up photos or videos of every affected room. Capture the water line, wet drywall, flooring, furniture, appliances, cabinets, and personal belongings. Write down the date, time, suspected cause, and each action taken to stop further damage.
Create a room-by-room inventory and save damaged items when practical. Keep receipts for emergency repairs, cleaning supplies, drying equipment, temporary lodging, and other flood-related expenses. This documentation can make insurance conversations easier.
Homeowners who need prompt local support can search for water damage cleanup near me when the affected area is too large for safe DIY cleanup or when moisture may be concealed beneath flooring or inside walls.
Step Five: Contact The Insurance Company
Report the loss as soon as possible and ask what your policy requires. Confirm your deductible, whether emergency mitigation is covered, how to document damaged belongings, and whether you should preserve materials for inspection. Sudden damage from a pipe or appliance may be handled differently than a gradual leak, while exterior flooding is often covered under a separate flood policy rather than standard homeowners’ insurance.
Do not wait for an adjuster before taking reasonable steps to prevent additional damage. Photograph first, follow the insurer’s instructions, and retain all receipts.
Step Six: Decide What Can Be Moved
Move dry belongings to a clean, secure area if doing so is safe. Separate dry items from wet ones, and place furniture legs on blocks or foil to reduce contact with wet flooring. Avoid throwing away damaged property until it has been documented, and your insurer or restoration professional has provided direction.
Soaked mattresses, cushions, carpeting, padding, insulation, and other porous materials can be difficult to save. Whether they can be cleaned depends on the water source, how long they were wet, and the amount of contamination.
Step Seven: Begin Safe Water Removal
Towels and mops may help with a small clean-water spill, but they are rarely enough for a significant flood. Never use a standard household vacuum or electrical tool in a wet area. Larger losses may require commercial pumps, extractors, air movers, and dehumidifiers.
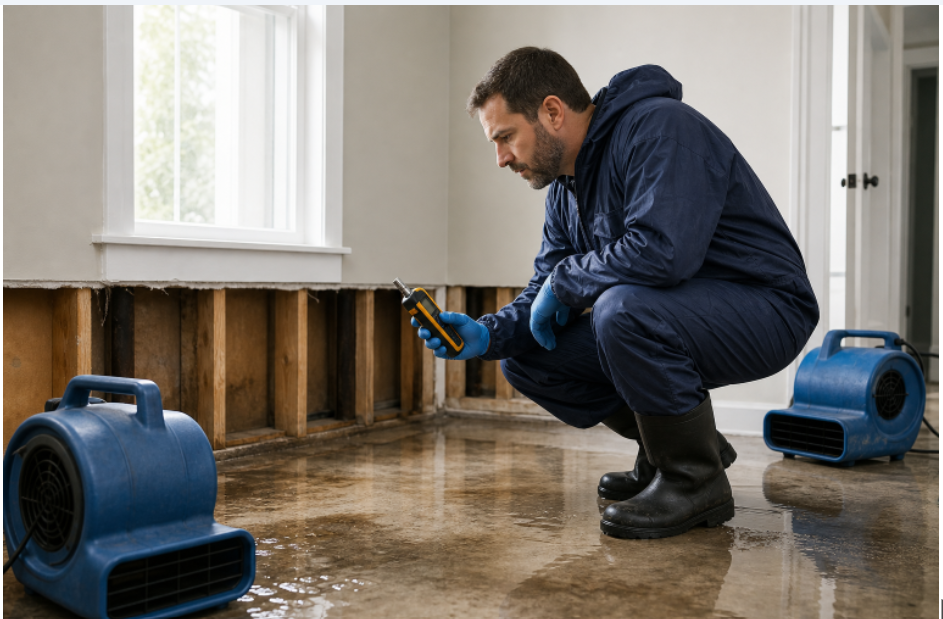
Professional drying is about more than making surfaces feel dry. Moisture can remain under vinyl, hardwood, tile, carpet, and subflooring, or behind walls and cabinets. Moisture readings help determine whether drying is actually progressing and when repairs can safely begin.
What A Professional Assessment Usually Covers
- Locating and documenting the likely water source.
- Inspecting affected rooms and nearby materials for hidden moisture.
- Identifying the likely contamination level of the water.
- Removing standing water and unsalvageable materials.
- Setting drying equipment and monitoring moisture levels.
- Cleaning and disinfecting affected areas when appropriate.
- Preparing the property for repairs after drying is complete.
Common Mistakes To Avoid
- Waiting for visible mold before beginning the drying process.
- Painting over stains or damaged drywall before the area is fully dry.
- Mixing bleach with ammonia or other cleaning products.
- Assuming a dry surface means the wall cavity or subfloor is dry.
- Discarding belongings before photographing and listing them.
- Attempting to clean sewage or stormwater without proper protection.
How To Reduce Future Water Damage
Identify your main water shutoff valve and test it periodically. Inspect washing machine hoses, water heater connections, dishwasher lines, refrigerator supply lines, and toilet valves. Clean gutters, correct drainage issues, and consider leak sensors near appliances and plumbing fixtures. Keep insurance details, utility contacts, home records, and emergency phone numbers together for faster action during the next unexpected leak.
Frequently Asked Questions
How Fast Can Mold Develop After Water Damage?
Mold risk rises as materials remain damp. Quick extraction, controlled drying, airflow, dehumidification, and moisture checks are more reliable than simply pointing household fans at a wet room.
Can Wet Drywall And Carpet Be Saved?
It depends on the water source, exposure time, material condition, and contamination level. Clean water losses caught early may allow some materials to be dried, while sewage or outdoor floodwater often requires more removal.
How Long Does The Drying Process Take?
Drying time varies based on the amount of water, humidity, airflow, building materials, and hidden moisture. A professional should confirm progress with moisture measurements rather than relying on appearance alone.
Conclusion
The first 24 hours after a home flood should focus on safety, stopping the source when possible, documenting the damage, contacting the insurer, and starting effective drying without delay. Careful action during this critical window can help limit damage, reduce health risks, and make the recovery process more manageable.