A kitchen or bathroom remodel can improve daily routines, storage, comfort, and the long-term usefulness of a home. The best results usually come from making important decisions before demolition begins, not while installers are waiting for an answer. Working with an experienced bathroom remodeling company can also help homeowners turn broad ideas into a detailed scope, realistic schedule, and workable selection plan.
Whether the goal is a simple refresh or a complete transformation, planning should focus on how the room needs to function. Style matters, but a beautiful space that lacks storage, lighting, ventilation, or safe circulation can still be frustrating to use every day.
Why Remodel Planning Matters More Than Trend Hunting
Inspiration photos are useful, but they do not reveal what lies behind the walls or whether a layout works in real life. Start by listing daily frustrations. A kitchen may look dated, for example, but the bigger problems may be poor task lighting, limited pantry space, and a lack of counter space near the stove. A bathroom may need better ventilation and easier-to-clean surfaces more than it needs a new color scheme.
Clear planning prevents rushed purchases, incomplete estimates, and expensive mid-project changes. It also gives every decision a purpose: solve a problem, support the household, or improve a feature that will be difficult to replace later.
Step 1: Define What the Remodel Must Solve
First, decide whether the project is cosmetic, partial, or full-scale. A cosmetic update might include paint, hardware, lighting, and fixtures. A partial remodel may replace cabinets, flooring, or a vanity while preserving most systems. A full remodel can involve layout changes, demolition, plumbing, electrical work, waterproofing, and new finishes.
- Write down the room’s biggest problems.
- Separate must-have improvements from optional upgrades.
- Consider who uses the room, how often, and what creates friction.
- Plan for future needs, including mobility, aging in place, children, pets, or resale.
Ask whether the layout is hard to use, whether storage is insufficient, whether plumbing or wiring is outdated, and whether the room needs to serve more than one purpose. These answers create a stronger plan than choosing tile first.
Step 2: Build a Budget Before Choosing Finishes
A complete budget should be established before shopping for cabinets, countertops, appliances, tile, or fixtures. Include design and planning, demolition and disposal, labor, subcontractors, cabinetry or vanities, countertops, backsplashes, plumbing, electrical work, lighting, ventilation, flooring, wall finishes, permits, delivery, storage, and cleanup.
Reserve a contingency fund for hidden conditions such as water damage, rot, damaged subflooring, outdated wiring, or the need for material substitutions. Older homes, major layout changes, and projects with extensive demolition generally need more flexibility than surface-level updates.
Step 3: Protect the Layout When It Makes Sense
Moving a sink, toilet, shower, dishwasher, or gas line can add work behind walls and below floors. If the current layout is functional, keeping major connections in place may allow more of the budget to go toward better storage, lighting, appliances, fixtures, or finishes.
That does not mean layout changes are always a mistake. Moving a doorway, widening a shower entry, relocating a cramped vanity, or creating a better kitchen work zone may solve a meaningful traffic-flow or accessibility issue. Review the added plumbing, electrical, and structural work before committing.
Step 4: Choose Materials for Real Life
Materials should meet the room’s daily demands, not just its showroom appearance. Consider how often a surface needs cleaning, whether it handles humidity and spills, whether replacement pieces will be available later, and whether it requires sealing or specialized care.
Practical choices often include durable flooring, moisture-resistant paint, easy-clean wall surfaces, deep drawers instead of hard-to-reach lower cabinets, layered lighting, and slip-resistant bathroom flooring. Matte finishes may hide fingerprints better, while glossy finishes can reflect more light but show smudges more easily.
Step 5: Check Safety, Permits, and Older-Home Concerns
Confirm local permit requirements before work begins, especially when plumbing, electrical, structural, gas, or mechanical systems are involved. Clarify who will submit permit applications, arrange inspections, and correct any issues found during the process. Do not cover leaks, mold, rot, damaged subfloors, or serious electrical concerns with new finishes.
For homes built before 1978, review lead-safe renovation practices before sanding, cutting, or demolition. Disturbing older painted surfaces can create hazardous dust, so safety planning should be part of the project’s beginning.
Step 6: Compare Contractors With Better Questions
Do not compare estimates by total price alone. Ask who will manage the job, which tasks are included, what is excluded, and which products are listed as allowances instead of fixed selections. Also discuss material ordering, storage, communication, daily cleanup, insurance, warranties, and the expected work schedule.
A detailed written proposal should identify labor, materials, payment stages, estimated dates, exclusions, and the process for approving changes. Whenever possible, change orders should be documented before extra work begins.
Step 7: Create a Timeline That Matches Reality
Most projects move through planning and measurements, design selections, estimates and contracts, permits when required, material ordering, protection and demolition, rough plumbing and electrical work, inspections, installation, finish work, and a final punch list.
Material lead times, inspections, weather, hidden damage, and delayed homeowner decisions can affect the schedule. Choose major items, including cabinets, appliances, tile, flooring, lighting, plumbing fixtures, and hardware, before demolition starts whenever possible.
Step 8: Prepare the Home for Construction
Make a plan for daily life during work. Set up a temporary kitchen with a microwave, coffee maker, portable cooktop, water source, and basic food storage if the main kitchen will be unavailable. Keep another bathroom accessible when possible, move fragile belongings away from the work zone, and protect pets and children from dust, tools, and open areas.
Agree on working hours, access points, parking, cleanup expectations, and periods when water or power may be temporarily interrupted. A little preparation reduces stress for everyone involved.
Common Planning Mistakes to Avoid
- Starting demolition before the design and measurements are complete.
- Choosing finishes before confirming product dimensions and installation needs.
- Accepting the lowest estimate without reviewing the scope in detail.
- Ignoring ventilation, task lighting, waterproofing, or storage.
- Leaving no budget room for hidden conditions or approved changes.
- Relying on verbal promises instead of a clear written contract.
How to Make Final Decisions With Less Stress
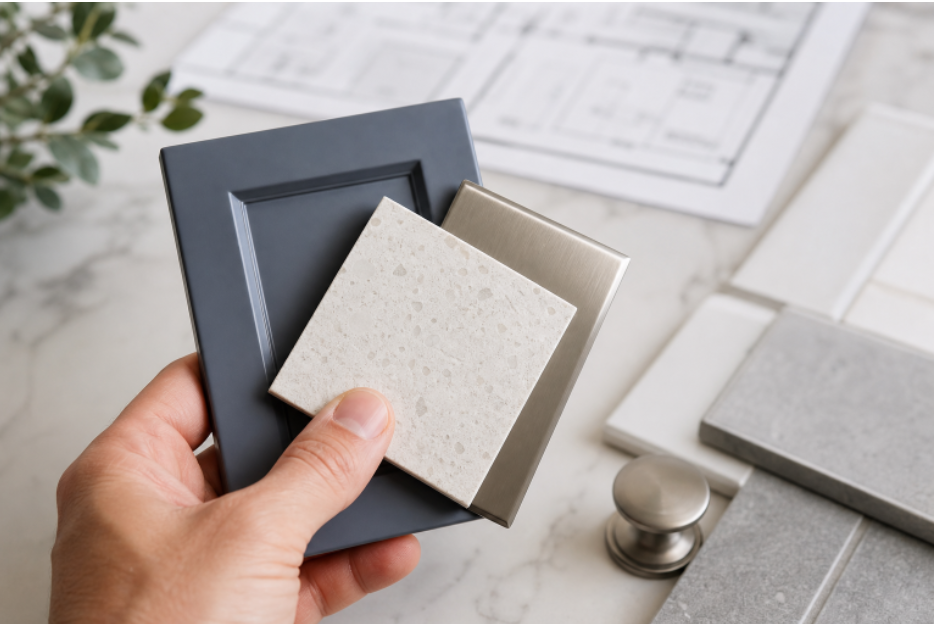
Use a simple decision order: choose the layout first, set budget limits, select durable high-use materials, pick one or two visual features that add personality, and verify measurements before ordering. Keep a folder with product details, receipts, warranties, finish samples, and signed approvals.
Prioritize elements that are costly to change later, including plumbing locations, electrical circuits, ventilation, cabinet dimensions, and waterproofing. Decorative details can be adjusted more easily than the systems beneath them.
Frequently Asked Questions
Should a Kitchen and Bathroom Be Remodeled at the Same Time?
Combining projects can simplify contractor scheduling, but it also increases upfront cost and household disruption. The right choice depends on the condition of each room, available funds, and whether the household can function during construction.
Is It Cheaper to Keep the Existing Layout?
Usually, keeping major plumbing and electrical locations can reduce labor and hidden construction work. A layout change may still be worthwhile when the existing room creates major safety, storage, or accessibility problems.
What Should Be Chosen Before Construction Starts?
Finalize cabinets, appliances, tile, flooring, plumbing fixtures, lighting, hardware, and major finishes before work begins. For older homes, homeowners should also consider how to make painted surfaces safer before renovation.
Conclusion
A successful kitchen or bathroom remodel begins long before the first cabinet is removed. Define the scope, build a complete budget, confirm safety and permit needs, select materials carefully, and put every major agreement in writing. The smartest remodel is not always the biggest one. It is the one that improves daily life while staying practical, clear, and manageable from start to finish.